

Registration can be a hassle if you don’t know what you are doing. In addition to the stress of not knowing if the class you want will be full or planning your schedule four months before actually taking classes, you may have to deal with wifi issues, and your roommate who can’t wait to tell you that he got into all of his classes that he wanted (That’s great, but your talking is distracting me from getting into MINE). This year students will have the extra task of learning the new registration system, Banner XE (Pronounced like “sexy” without the “s,” or with the “s.” I don’t want to tell you how to live your life.).
I’ve played around on the Beta version of Banner XE, and used some of its new features, and my first impression is that the system lives up to its name. It’s really sexy, but the process can be difficult if you don’t have someone to walk you through it. For this reason, we’ve created a handy guide for using Banner XE. Here are seven “sexy” tips for using Banner XE to register.
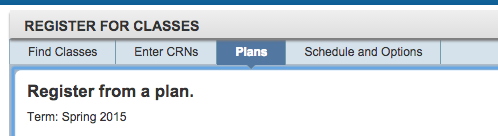
1. You can plan and view your entire schedule before registration opens.
The coolest feature of Banner XE is the ability to plan ahead. it looks like this:

Simply give that little guy a click and you’ll be transported to the exact same portal you will see on registration night. You can look for classes, build a schedule and view any holds that might be on your account. You can even create multiple plans in case some jerk senior gets the last seat in that Geology class you were trying to take.
Creating a plan will make registration night a snap, because rather than entering CRNs (and effectively racing against the entire sophomore class for the last spot in the only afternoon English 2010 class) you can just press the “plan” tab, and then “apply plan” and your classes will automatically be added to your registration cart.
If you prefer registering by entering CRNs, you can still do that by clicking on the “Enter CRNs” tab.
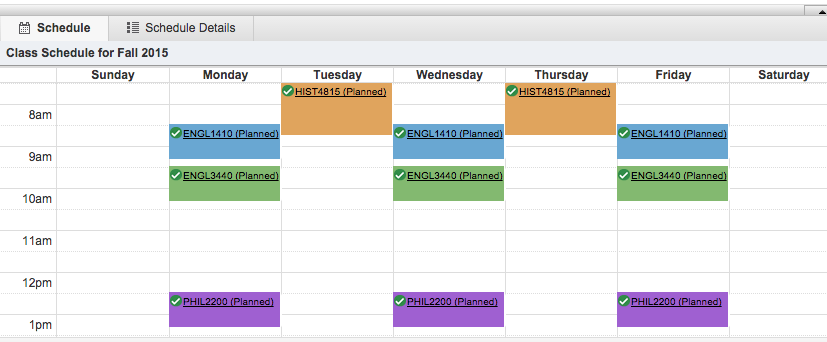
The new system makes planning way easier because you can see everything in real time. Just look at my schedule – I won’t be able to register until tonight, but my schedule is already prepared.
2. Don’t forget to select a section of the class you want.
Unfortunately, the new system will let you add a class to your cart without selecting a course section. This may cause you to think that you have been enrolled in a class, but really you you haven’t. To avoid this problem, make sure you add classes from the section and not from the class overview.

Don’t click on “add course” before clicking “view sections.”
Instead, click on “add” after clicking “view sections:”

3. Make sure you are not running a script blocker like AdblockPlus.
You may have trouble viewing some of the buttons and class sections if you are using an adblocker like AdBlockPlus, or Ublock. Disable these before trying to register, I promise you won’t see any adds for “natural” male enhancement on the university webpage, so it’s okay to turn those off.
4. For goodness’ sake, don’t use Safari or Internet Explorer.
There have been compatibility issues with Safari and IE. Just download Google Chrome or Mozilla Firefox and you should be fine.
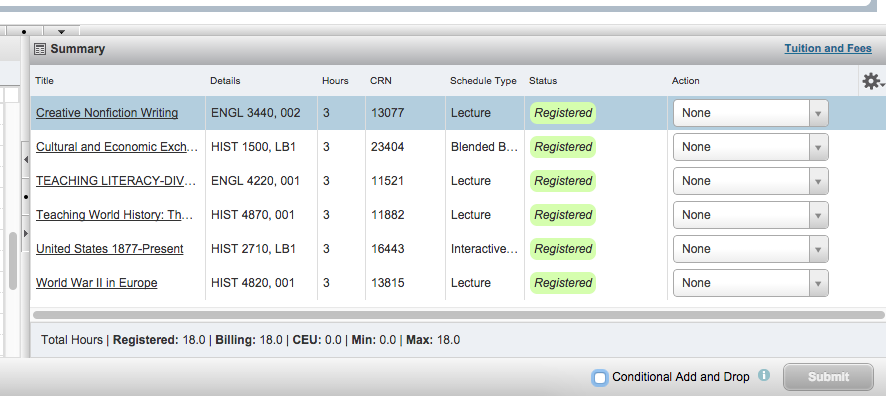
5. The “Conditional Add/Drop” will stop you from dropping a class if you can’t get into another.
If you want to change your schedule, but only on the condition that you get into all the new classes you want, use the “Conditional Add/Drop” feature. You can find this feature next to the “submit” button. This feature will only change your schedule provided that the classes you want aren’t full or there isn’t any scheduling conflict. You can use this if you are already enrolled in a class, and want to switch sections but only if you are sure you can get in. It’s a great feature for those “if only” situations.
![]()
6. Don’t forget to hit “submit.”
On Banner XE, not only do you have to add the classes, you also have to hit submit. When you are satisfied with your schedule, just make sure to hit the “submit” button in the lower part of the screen.
Bottom left corner, people. It’ll save lives.
7. The IT Service Desk will be on call during registration.
For the first time ever, the IT Service Desk will be on-call during registration to answer student concerns. If you run into any troubles, just dial 435-797-HELP (4357) and someone should help you.
You can also find handy video tutorials from USU IT by clicking here.


